Bill Accounts
Manage all your company bill accounts in one place. Bulkpe auto-fetches due bills for active accounts and lets you activate or deactivate them from the same tab. Add cost centers and multiple UDFs (User Defined Fields) for internal accounting and reconciliation.
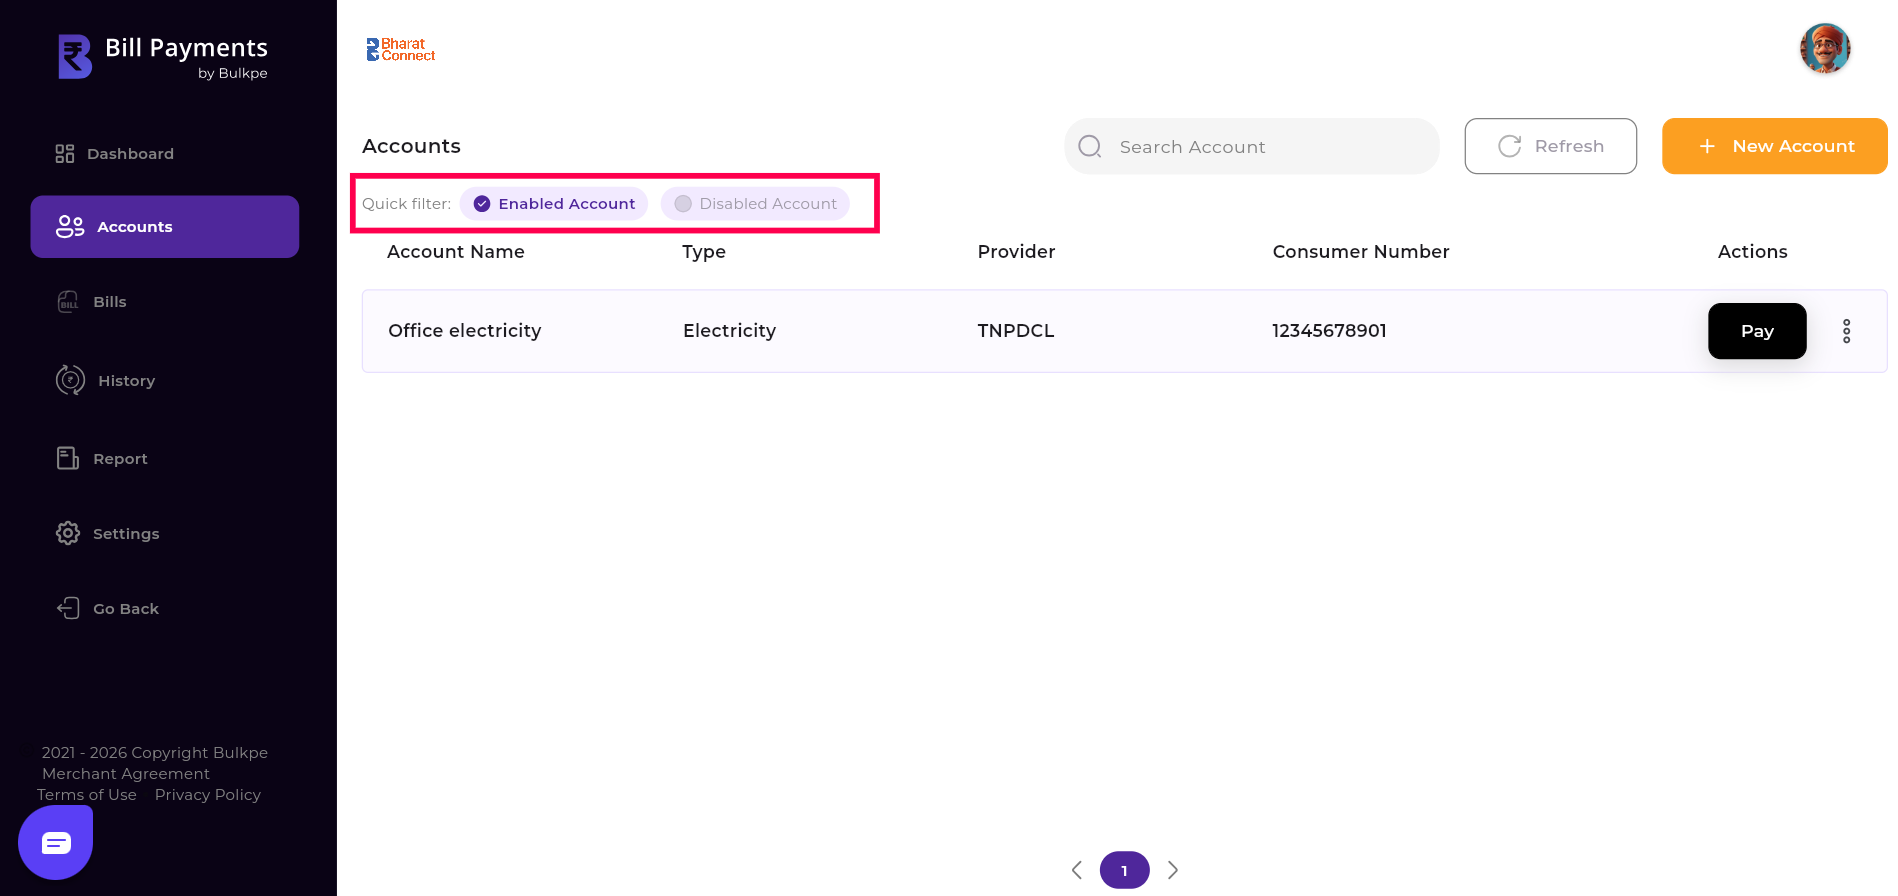
Step 1 : Navigate to Bill Payments Dashboard —> Accounts
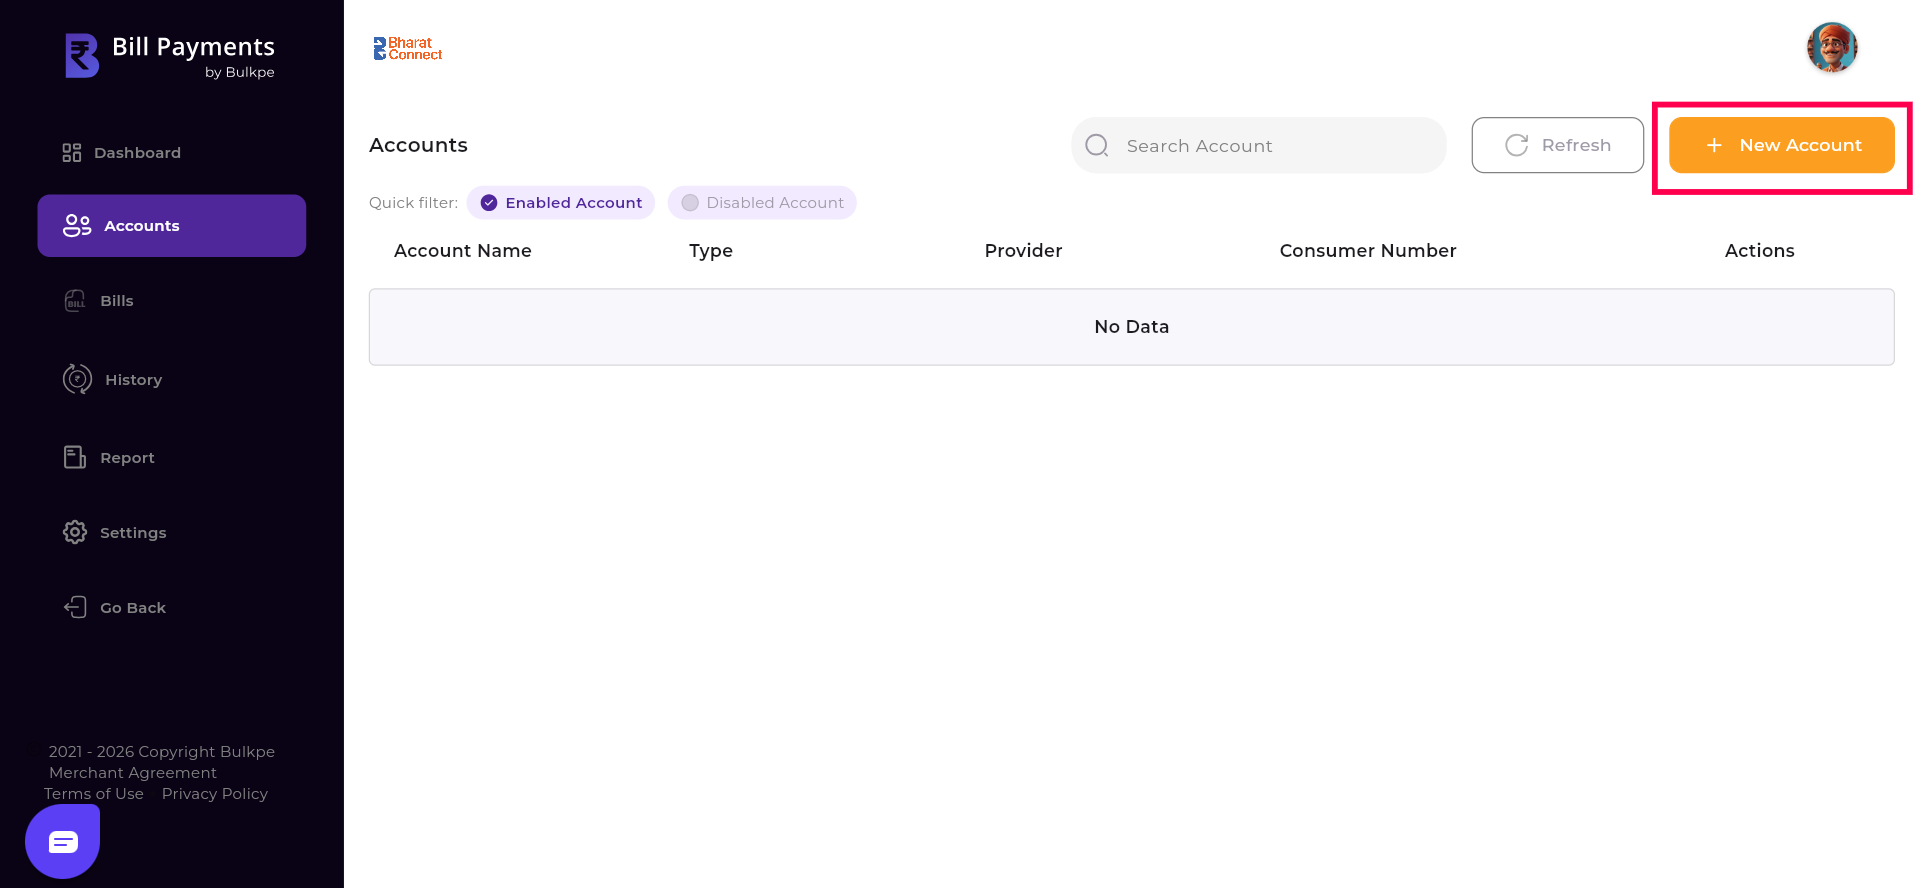
Step 2 : Click “+ New Account” button on top right corner of the page.
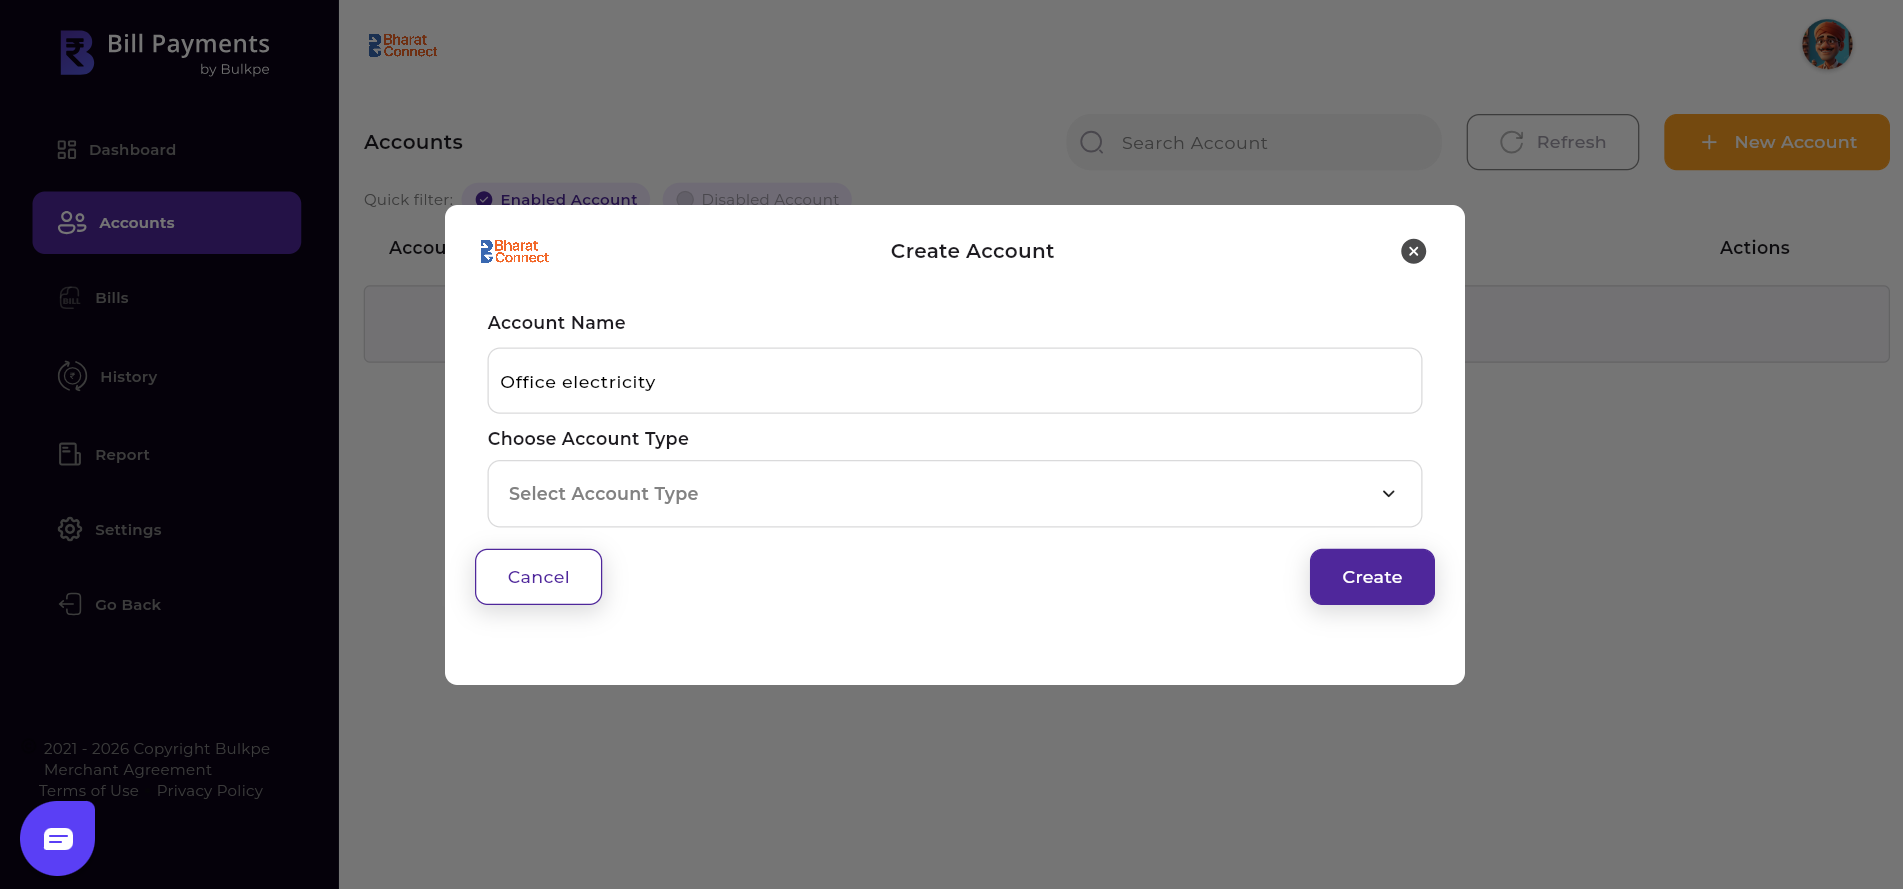
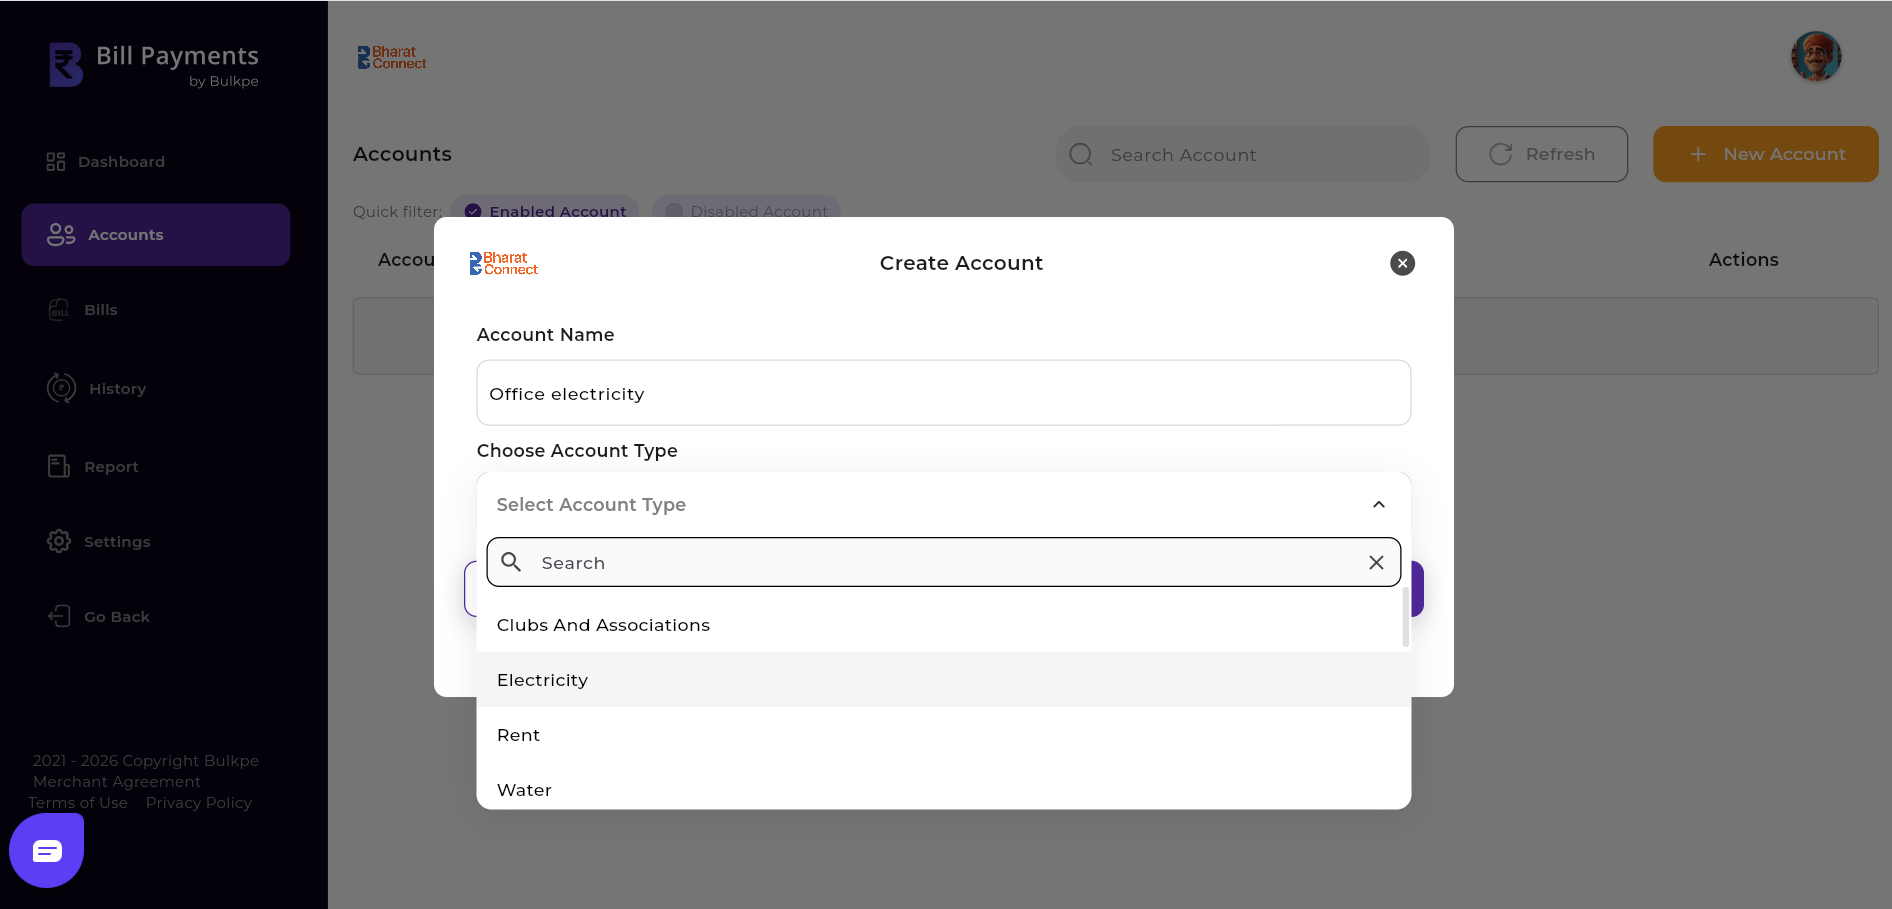
Step 3 : Enter the “Account name” and choose “Account Type” of your choice.
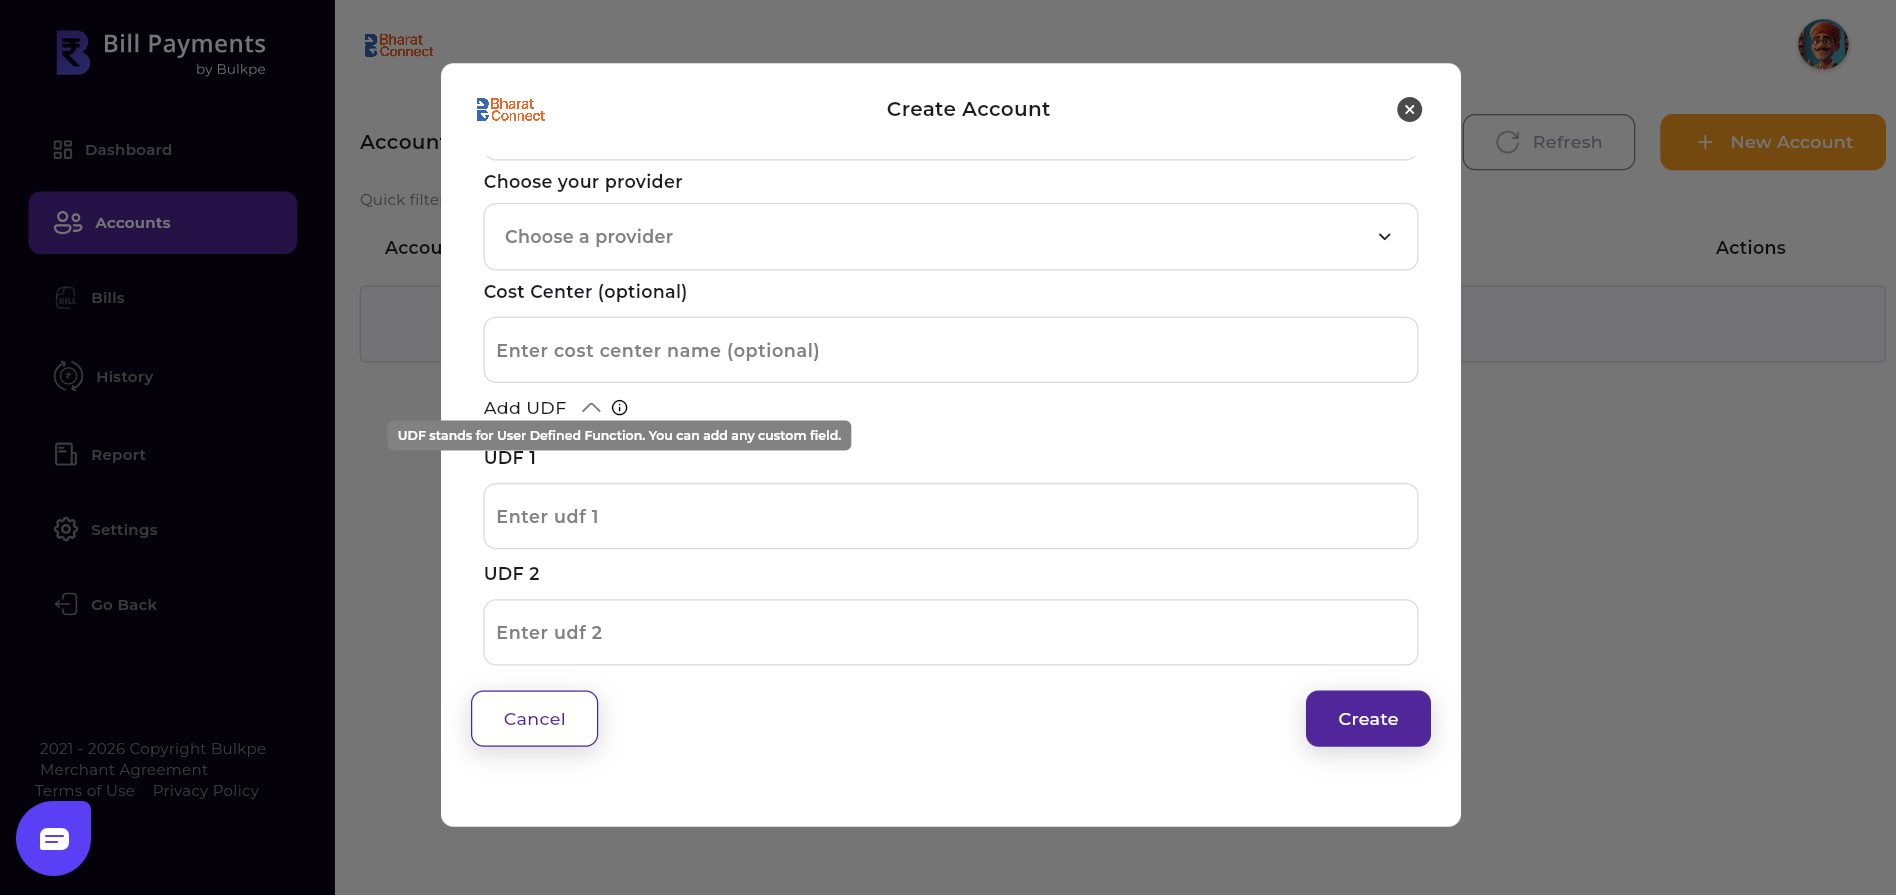
Step 4 : Choose Provider and enter Cost center (if any) :
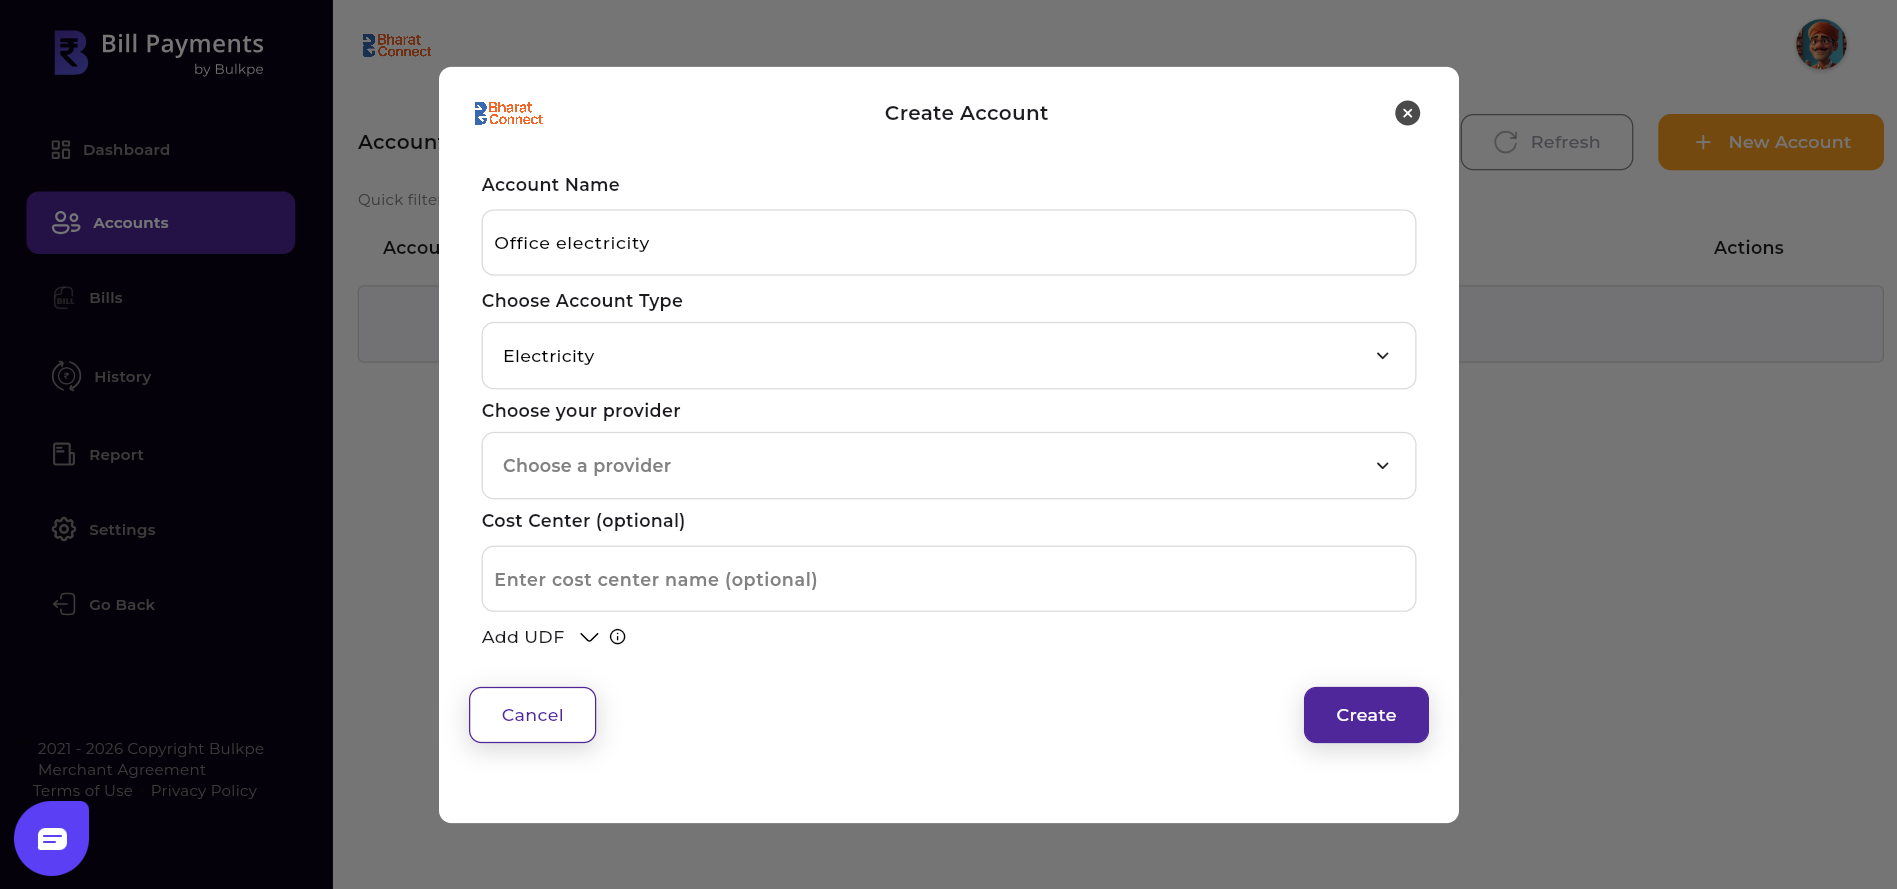
Step 5 : We also provide 2 optional UDF (User Defined Functions) fields for user to enter customized parameters.
Note : If you're planning to onboard large number of Bill Accounts, instead of manually creating Bill Accounts, please reach out to [email protected] for automating and onboarding support.
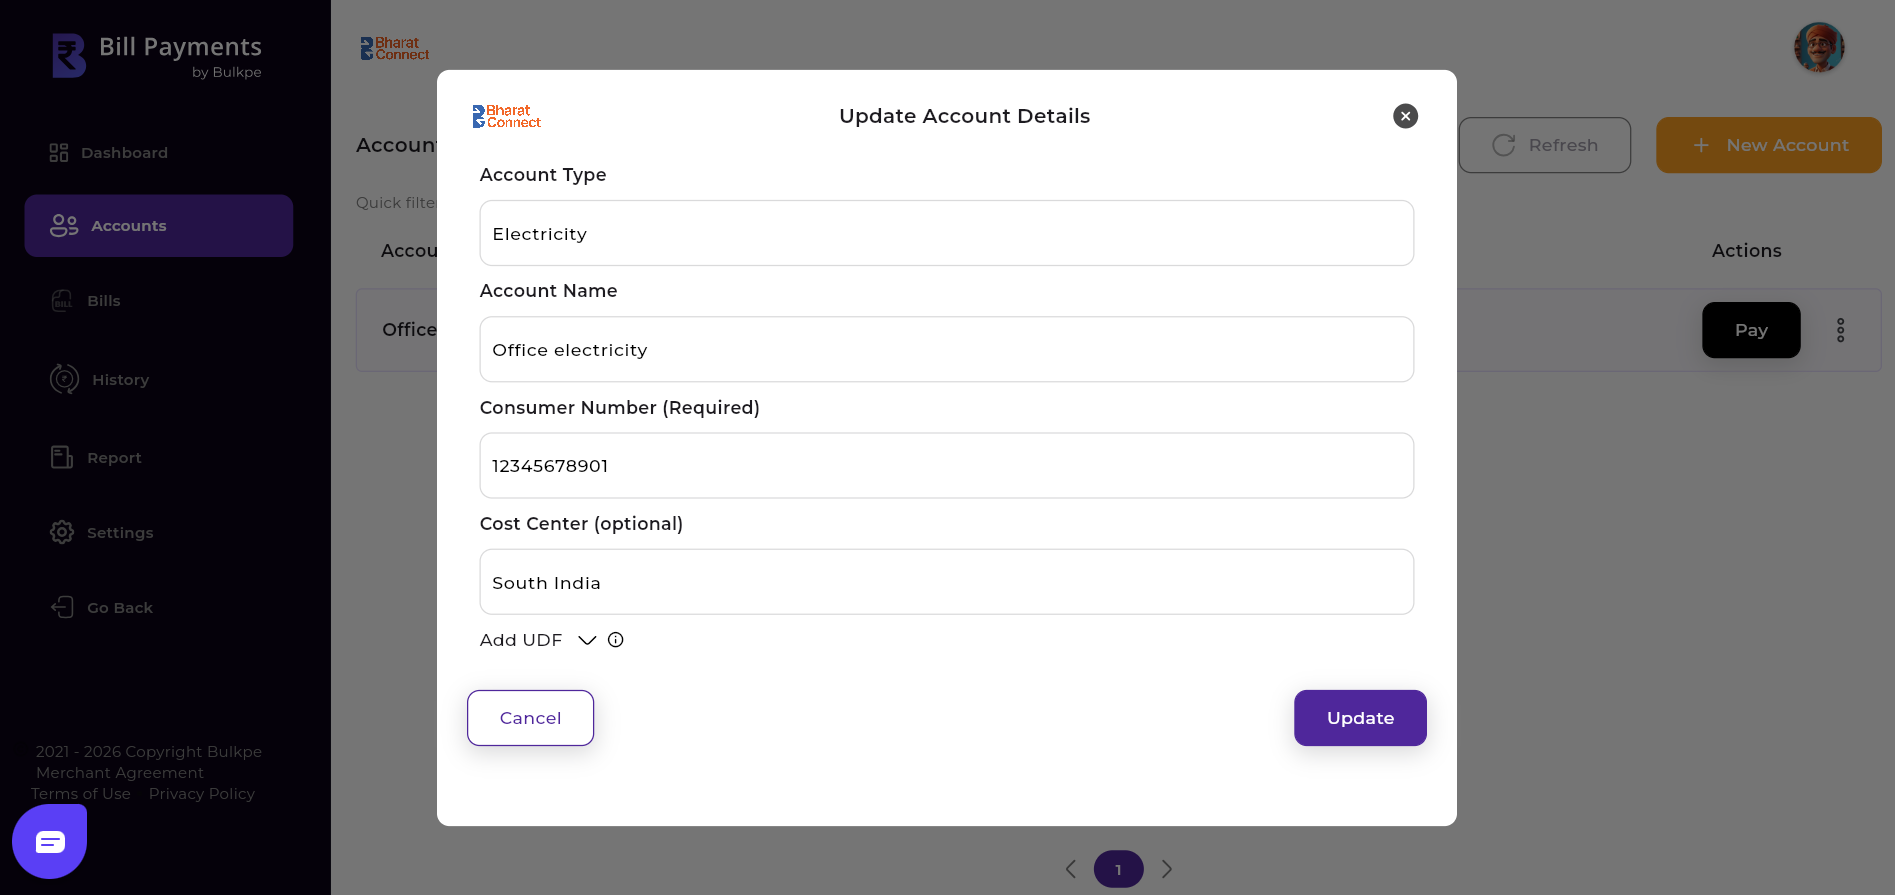
Users can modify or update their previously saved account details using this option.
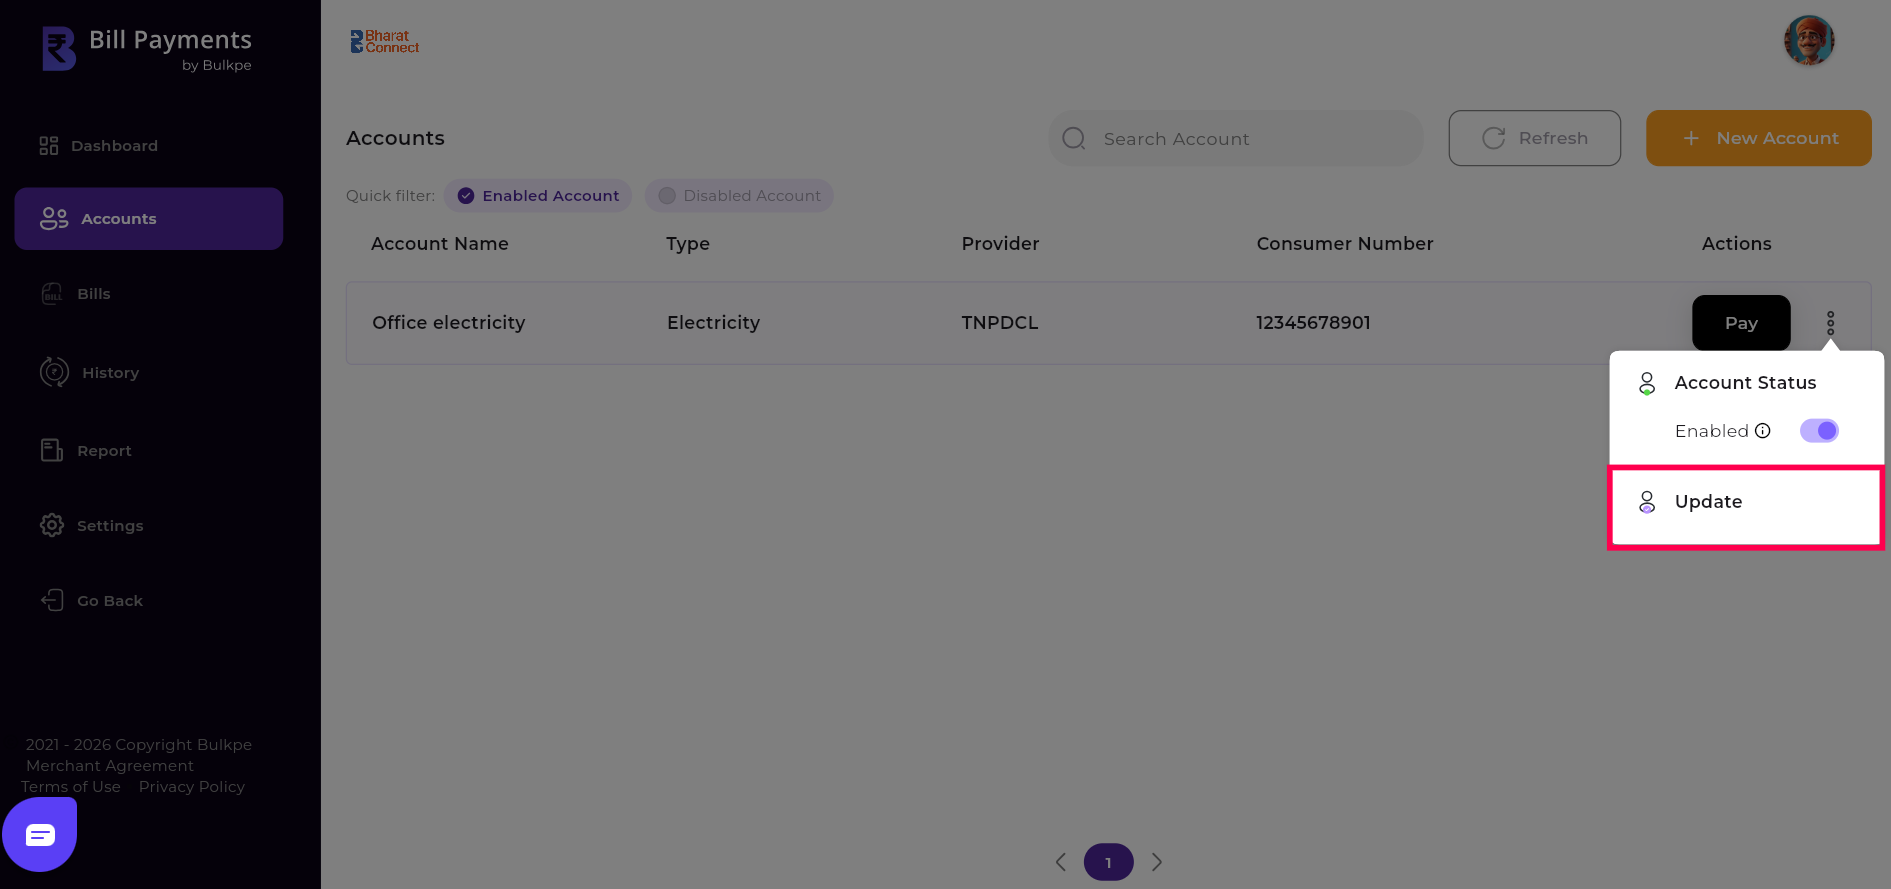
You can control the visibility of bills by enabling or disabling an account. When an account is enabled, all bills associated with that account will be displayed in the Bills section for tracking and payment. When an account is disabled, bills linked to that account will be hidden from the Bills section and will not appear for further action. This option allows you to manage which accounts remain active and visible within your dashboard.
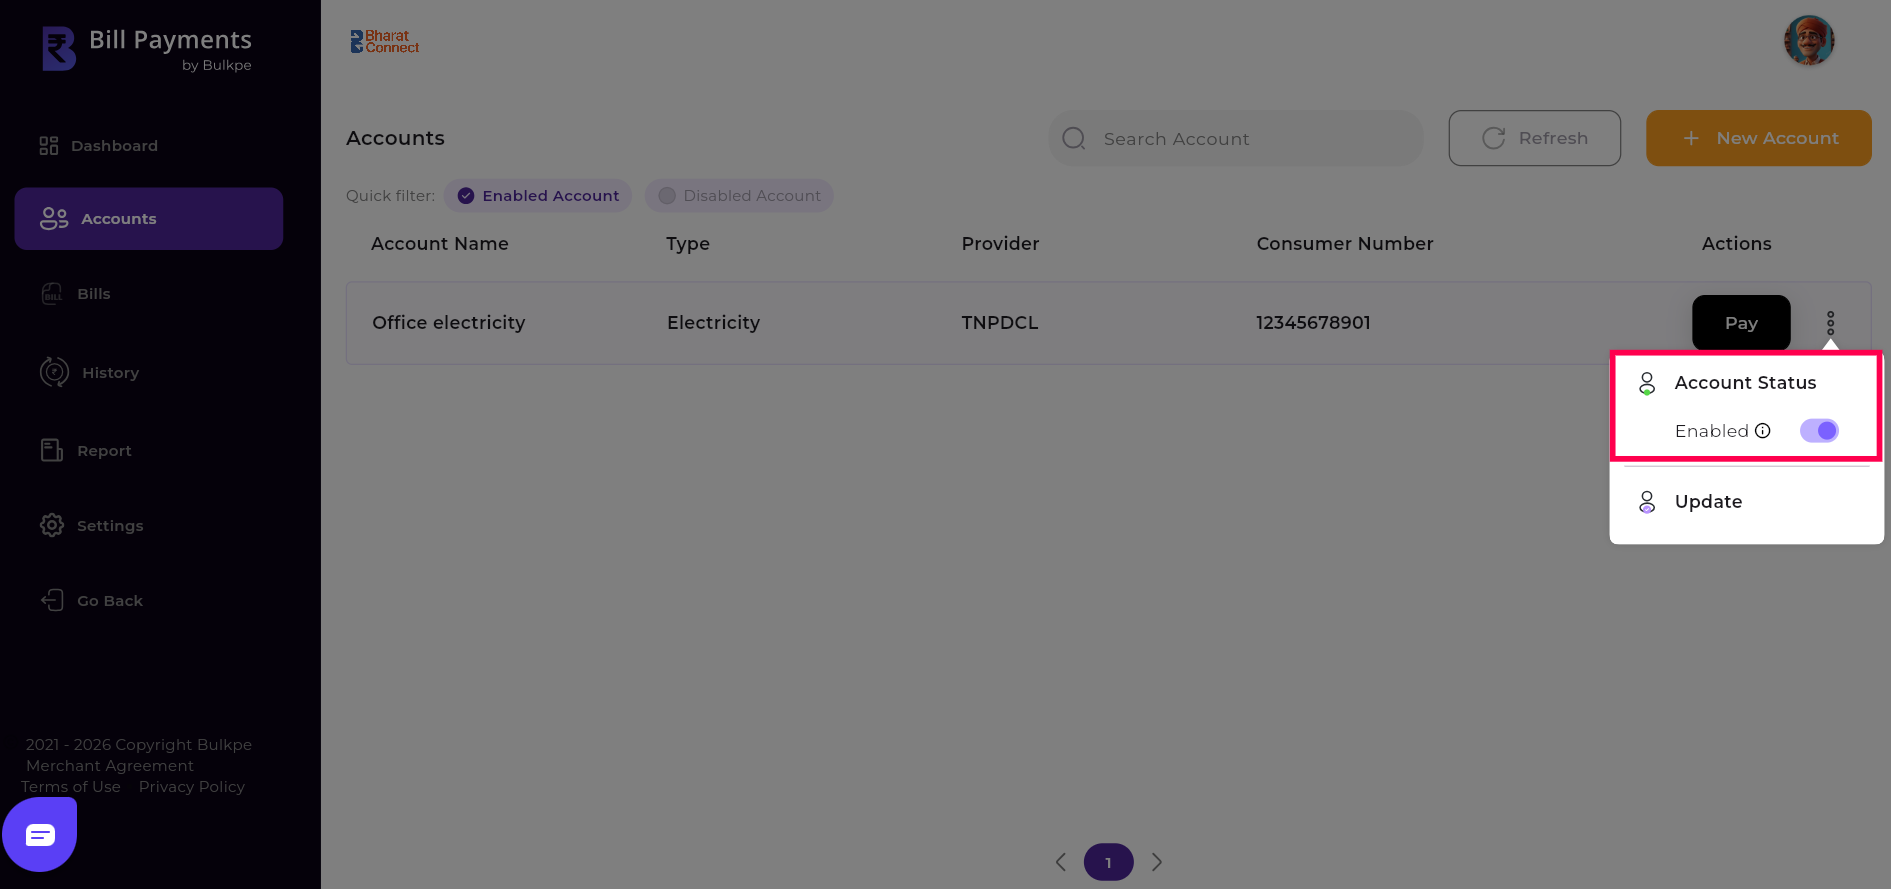
Users can view enabled or disabled accounts by selecting the respective filter. To disable an account, navigate to the Enabled Accounts list and choose the appropriate option from the account menu. Similarly, to enable an account, go to the Disabled Accounts list and select the enable option from the account’s menu.